Fish shell and customization
Table of Contents
This weekend I spent some time tweaking the Terminal on my Mac with iTerm2 and Fish shell. Why did I do it? First of all, I have been quite fed up with the boring black-and-white look of the default Terminal app. In my opinion, the introduction of multiple colors together with glyphs/icons not only makes it look better visually, it also helps one distinguish different contents (e.g. directories, files) more easily. Moreover, I just want more customizations and features like autosuggestions to make working with command lines a little more efficient. So below are the ingredients I used to customize my Terminal and instructions for some key steps.
Ingredients #
- iTerm2: A popular terminal emulator for macOS
- Colors: I personally use Solarized Dark
- Download Solarized
- Unzip and double click on the the color scheme
Solarized Dark.itermcolorsunder the directory/iterm2-colors-solarized - Open iTerm2’s Preferences → Profiles → Colors, and select the theme under Color Presets
- Text: We need one of the Nerd Fonts to render the glyphs/icons; I chose two of them
- Meslo Nerd Font: Downloaded from the Tide repo; this particular font contains all the glyphs needed
- Source Code Pro Nerd Font: Installed on Homebrew via
brew tap homebrew/cask-fonts(only need to run this once) and thenbrew install --cask font-source-code-pro; This is the font I’d like to use in text - Alternatively, all the Powerline Fonts can be installed based on this repo
- Go to iTerm2’s Preferences → Profiles → Text, under Font, choose
Source Code Pro (for Powerline)or any font you like; select Use a different font for non-ASCII text, then chooseMesloLGS NFunder Non-ASCII Font
- I also resize the New Windows to be 120 columns and 40 rows under the Window panel
- Colors: I personally use Solarized Dark
- Fish shell: A great alternative to
bashandzsh- Installation:
brew install fish - Set fish as the default shell:
- Add the shell to
/etc/shellswithecho /usr/local/bin/fish | sudo tee -a /etc/shells - Change the default shell with
chsh -s /usr/local/bin/fish
- Add the shell to
- Oh My Fish: Package manager for customizing the fish shell
- Check all the themes contained in Oh My Fish:
omf theme - I installed the Agnoster theme:
omf install agnoster - Apply the theme:
omf theme agnoster
- Check all the themes contained in Oh My Fish:
- Fisher: Plugin manager for fish
- See all the plugins and prompts here
- Installation:
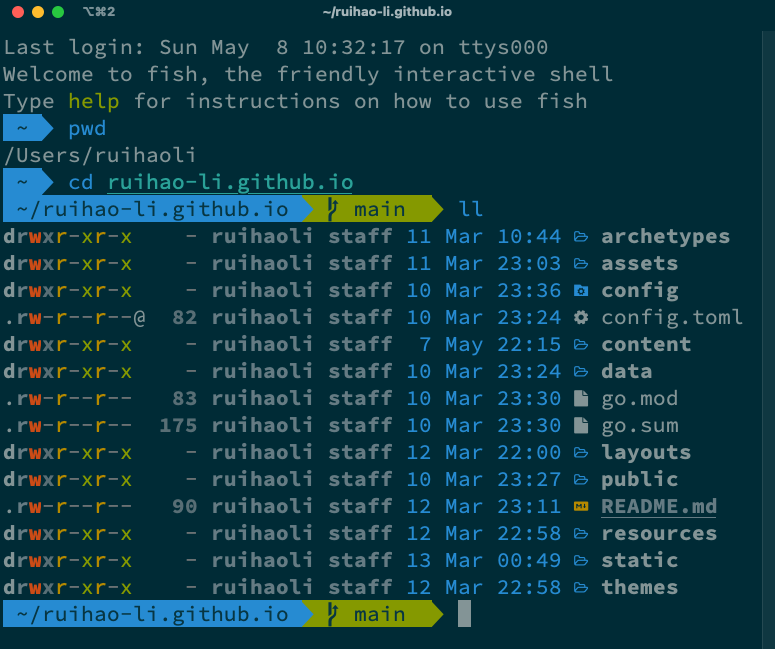
- Exa: Replacement for
ls- Installation:
brew install exa - Customized
llandlla:- Find fish config file (
config.fish) in~/.config/fish - Add the following lines to the config file (I got this trick from the great Takuya Matsuyama):
if type -q exa
	alias ll "exa -l -g --icons"
	alias lla "ll -a"
end
- Find fish config file (
- Installation:
OK, there you go! Enjoy the fresh new look!
Update 1 #
While setting up fish on a M1 Mac yesterday, I realized that the fish shell path is not the same as in Intel-based Macs. So if you have a Mac with Apple Silicon, after brew install fish you can run:
fish_add_path /opt/homebrew/binecho "/opt/homebrew/bin/fish" | sudo tee -a /etc/shellschsh -s /opt/homebrew/bin/fish